
Backlit Wedding Photography: How to Nail the Silhouette & Rim Light Shots
There’s a moment at almost every wedding — golden hour rolls in, the sun drops behind the treeline, and the light turns absolutely magical. Most photographers panic. The best ones reach for their camera and shoot.
Backlit wedding photography is one of the most powerful tools in your creative arsenal. Done right, a perfectly exposed silhouette or a rim-lit couple portrait stops people mid-scroll. It evokes emotion, tells a story, and shows off your technical chops all at once.
But backlighting is also one of the trickiest lighting scenarios to control. Expose for the background and your subjects go dark. Expose for your subjects and you blow out the sky. Add flash and you risk killing the mood entirely — unless you know exactly what you’re doing.
This guide breaks down everything: the science behind backlighting, how to meter correctly, when to pull out flash, and how to create those jaw-dropping silhouette and rim light shots that clients frame and hang above their mantels. Photographer to photographer — let’s get into it.
1. Understanding Backlit Wedding Photography: What’s Actually Happening with Light
Backlighting occurs when your primary light source sits behind your subjects, facing your camera. Understanding this relationship is the foundation of every great backlit wedding shot.
When you place a couple between your camera and the sun — or any strong light source like an open window, a doorway, or an artificial strobe positioned behind them — the light wraps around their edges and creates that luminous, almost cinematic glow we’re chasing.
There are two distinct effects you’ll be working with:
- Silhouettes: The subject is rendered completely or nearly completely dark against a bright background. The exposure is biased toward the light source, leaving the subjects as recognizable shapes.
- Rim lighting (also called hair light or edge light): The background is still bright, but a secondary fill source — flash, reflector, or ambient bounce — lifts the subject’s exposure so their face and details are visible while that beautiful backlit halo glows around them.
Both looks are legitimate artistic choices. Knowing which one to go for — and how to execute each — is where the craft lives.
The Physics of the Backlit Exposure Problem
Your camera’s meter reads the entire scene and averages it out. When there’s a blazing sunset behind your couple, the meter gets confused. It sees all that bright light and tries to protect the highlights, which means it underexposes your subjects.
Switch to spot metering and aim at your subject’s face to expose for skin tones — but now your sky blows out. This is the core tension in backlit wedding photography, and every technique in this guide is essentially a solution to this single problem.
Understanding that you’re fighting a high-dynamic-range scene puts you in control. Once you accept that you can’t expose perfectly for both the background AND the subject in a single frame without modification, you can make a deliberate creative decision rather than chasing a technically impossible exposure.
The three paths forward: embrace the silhouette, add light to your subject (flash or reflector), or bracket your exposures for HDR blending in post. Most wedding photographers live in that first or second zone.
2. Camera Settings for Backlit Wedding Photography
Getting your camera settings right is non-negotiable in backlit situations — auto modes will fight you every single time. Here are the settings that actually work.
Start in Manual mode. This gives you total control over the relationship between your shutter speed, aperture, and ISO without the camera second-guessing your artistic intent every time you recompose.
Silhouette Settings
For a clean silhouette, you want to expose for the background — specifically the brightest part of the sky or light source.
- Metering mode: Spot meter on the sky, not your subjects
- Aperture: f/8 to f/16 depending on how dramatic you want the sunstar effect (smaller aperture = more pronounced star burst)
- Shutter speed: 1/500s to 1/2000s to control ambient exposure
- ISO: Keep it low — ISO 100 to 400
- White balance: Shade (7500K) or Cloudy (6500K) for warm, punchy golden tones
A useful starting reference is the Sunny 16 Rule: on a bright sunny day, at f/16, your shutter speed should match your ISO (e.g., ISO 100 = 1/100s). Adjust from there for creative effect. For silhouettes, you’ll typically be stopping down even further or using a faster shutter to darken the subject even more.
Rim Light Settings
For rim-lit portraits where you want both subject detail and a glowing backlit edge, the approach changes:
- Aperture: f/1.8 to f/2.8 for shallow depth of field and maximum lens flare character
- Shutter speed: 1/200s (at or below sync speed if using flash)
- ISO: 100-800 depending on ambient
- Exposure compensation: -0.7 to -1.3 stops to protect that background glow
Shoot in RAW. Always. Backlit scenes compress dynamic range and you’ll need every bit of latitude in post to recover highlights and lift shadows without introducing banding or noise.
3. How to Shoot Perfect Wedding Silhouettes
A great wedding silhouette isn’t just about underexposing your subjects — it’s about composition, pose, and timing working together to create a recognizable, emotionally resonant image.
The single most important rule: your subjects must read as distinct, recognizable shapes. If the bride and groom merge into one blob, the image fails. This means everything — from their pose to their positioning relative to each other — matters more than in any other type of portrait.
Posing for Silhouettes
Classic silhouette poses that always work:
- The profile kiss: Both subjects in true profile so two separate faces are visible kissing — never shoot a silhouette kiss from the front where noses disappear into each other
- The forehead touch: Faces nearly touching, heads tilted, gap visible between foreheads — intimate and clean
- The dip: Dramatic, classic, and absolutely impossible to misread as a shape
- Walking away hand-in-hand: Simple, timeless — use a wide lens to include landscape context
- The lift: Groom lifting bride — creates vertical energy and clear separation between bodies
Avoid poses where arms, hands, or legs overlap in confusing ways. What reads as romantic and natural in a normally lit portrait can look like a strange blob in silhouette. Before shooting, physically step back and squint at the couple — if you can read the pose clearly through squinted eyes, it’ll read in silhouette.
Finding and Creating the Right Backlit Background
The best silhouette backgrounds are simple and bright. Look for:
- The open sky just above the horizon at golden hour
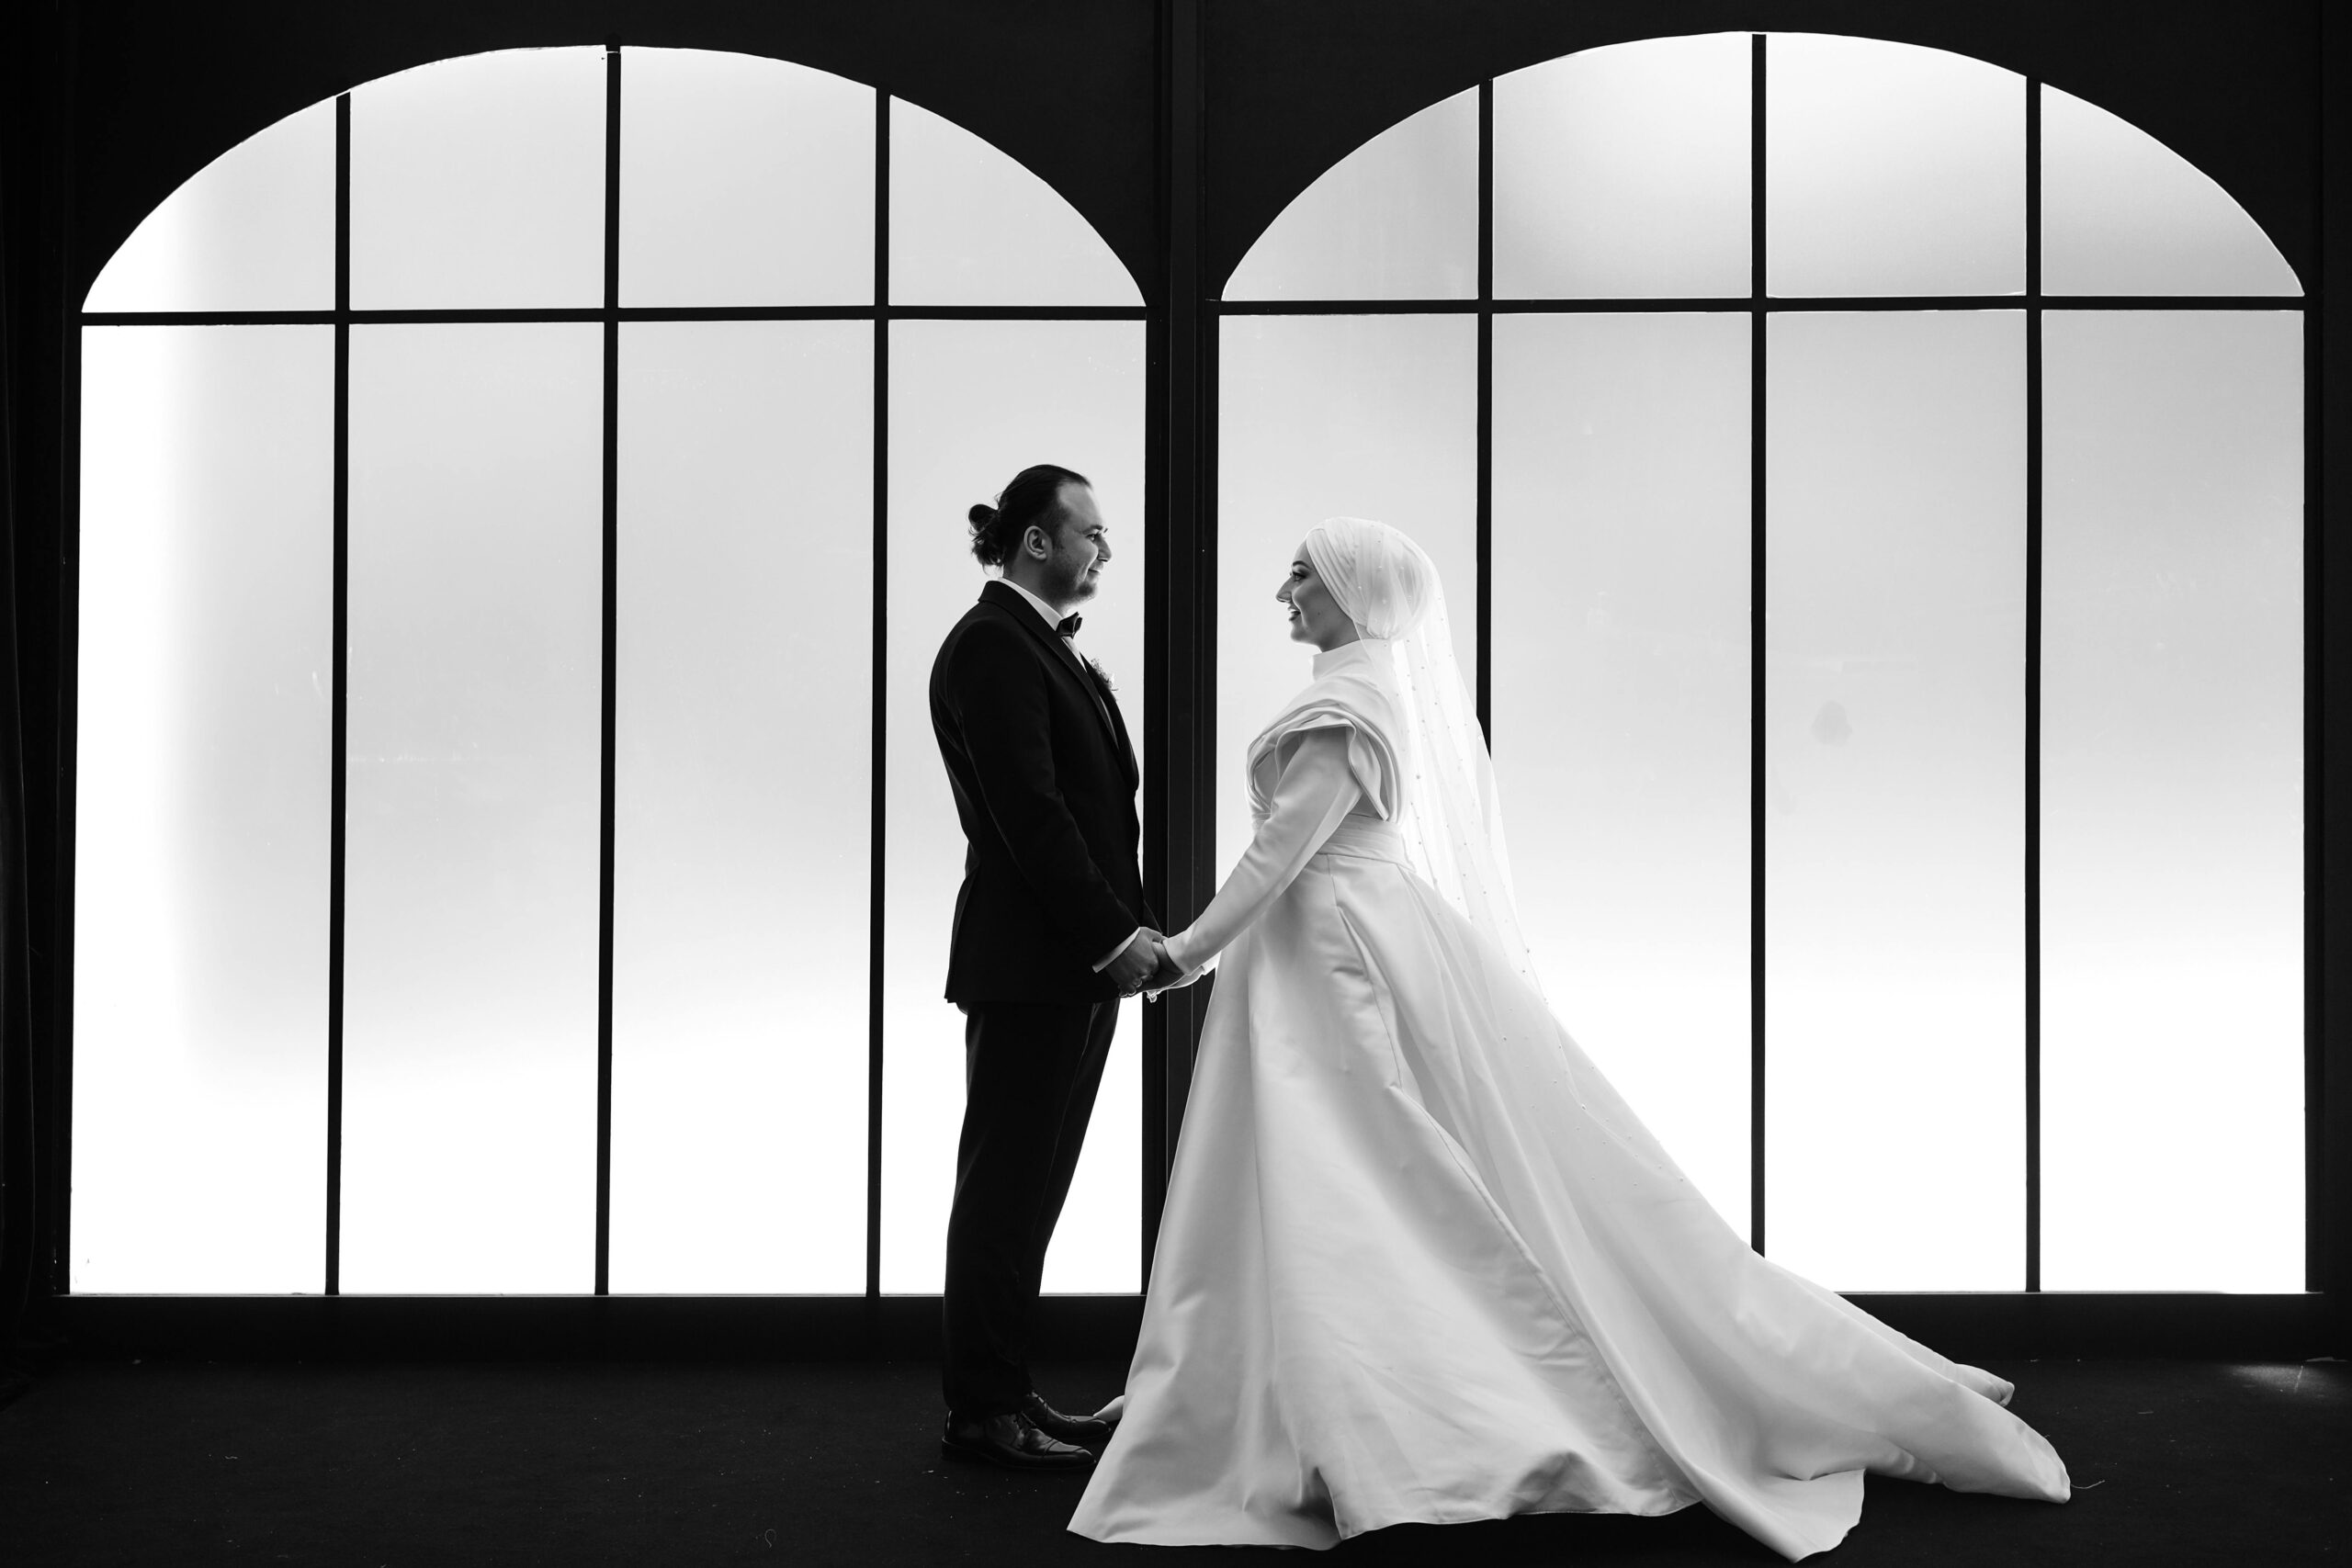
- Open doorways or archways with bright exteriors
- Large windows during ceremony or reception
- Candles or string lights for intimate indoor silhouettes
- Venue uplighting positioned behind the couple on the dance floor
Get low. Shooting slightly upward puts your subjects against the brightest part of the sky and eliminates busy backgrounds like trees or buildings that would compete with your subjects’ outlines.
4. Rim Lighting Techniques: Adding Flash Without Killing the Mood
Rim lighting is backlit wedding photography’s most sophisticated technique — it lets you keep that gorgeous backlit glow while still showing your couple’s faces and expressions. The key is balancing your flash output precisely with the ambient light.
This is where most photographers either give up and shoot silhouettes all night, or blast their subjects with too much flash and create an artificially lit look that kills the natural atmosphere. The goal is to add just enough light that it looks like it was always there.
Flash Techniques for Backlit Wedding Portraits
Off-camera flash (OCF) is your best friend here. A single speedlight or strobe positioned to camera left or right, firing through a small modifier like a Magmod sphere or a 24-inch softbox, adds beautiful directional fill without the flat, on-camera flash look.
Neil van Niekerk’s approach — widely taught and incredibly effective — involves setting your ambient exposure first, then dialing the flash power up in small increments until the subject’s face is exposed correctly. He typically shoots between -1 to -1.7 stops of flash exposure compensation relative to ambient, keeping the fill subtle and the mood intact.
Rear curtain sync (also called second curtain sync) is a technique worth knowing for any shot involving movement or longer shutter speeds. It fires the flash at the END of the exposure rather than the beginning, which means motion blur trails behind the subject naturally rather than in front of them. For first dances or sparkler exits with backlight, this creates a more natural-looking motion trail.
Key flash settings for backlit rim lighting:
- Power: Start at 1/16 and adjust
- Flash exposure compensation: -1 to -1.7 stops below ambient
- Sync speed: 1/200s or lower (or use HSS — High Speed Sync — if your system supports it for golden hour shots where you need faster shutters)
- Modifier: Anything that softens and spreads the light; avoid bare flash
Using Reflectors Instead of Flash
If you’re a natural light photographer or just don’t want to manage flash during a fast-moving timeline, a 5-in-1 reflector held by a second shooter or assistant can bounce the backlight back onto your subjects’ faces. Use the silver side for punch or the white side for softness. Position it just below the couple’s eyeline (like a natural bounce from the ground) to avoid the upward-horror-movie-lighting look.
5. Composition and Lens Choices for Backlit Wedding Photography
Your lens choice dramatically changes the character of your backlit wedding images. This isn’t just about focal length — it’s about how different lenses handle flare, bokeh, and contrast in high-contrast backlit scenes.
Backlit conditions are composition-intensive. The light does a lot of the emotional heavy lifting, but your job is to frame it in a way that maximizes its impact.
Best Lenses for Backlit Wedding Shots
85mm f/1.4 or f/1.8: The workhorse of backlit wedding portraits. Fast aperture for beautiful rim-light separation, flattering compression, and lenses in this range tend to produce gorgeous, organic flare when the sun clips the front element. The Canon 85mm f/1.4L and Sony 85mm GM are favorites for this exact reason.
35mm f/1.4: Great for environmental silhouettes where you want to include venue context — the open field, the barn doors, the beach. More dramatic wide-angle perspective puts the couple in their world.
70-200mm f/2.8: Telephoto compression crushes the distance between foreground subjects and background light sources, making sunsets look closer and more dramatic. Excellent for silhouettes when you can’t get physically close to the couple.
Vintage or manual lenses: Many photographers deliberately choose older, lower-contrast lenses for backlit work specifically because they flare in unpredictable, organic ways. A vintage 50mm Helios or Meyer-Optik can produce swirling bokeh and cinematic flare that no modern lens can replicate.
Composition Rules That Elevate Backlit Images
- Frame the light source: Use archways, trees, or doorways to frame your backlight — it contains the flare and adds context
- Rule of thirds positioning: Place the couple at an intersection point, letting the glowing background fill the other two-thirds
- Include leading lines: A pathway, aisle, or horizon line that leads the eye toward your backlit couple
- Shoot into the sun deliberately: Partially hiding the sun behind the subject’s head creates the most dramatic rim halo and controls flare
- Negative space: Simple, empty sky behind silhouetted subjects creates powerful, editorial images
6. Post-Processing Backlit Wedding Photos: Edit Like a Pro
Great backlit wedding photography is finished in post — not rescued there, but finished. Your editing choices determine whether a good shot becomes a portfolio image or stays buried in the delivery gallery.
The good news: RAW files from backlit scenes have more dynamic range than you think. With modern sensors (especially Sony and Nikon mirrorless), you can pull shadows up by 3-4 stops without catastrophic noise. You can recover highlight detail in a blown sky more than you’d expect.
Lightroom Workflow for Backlit Wedding Images
Step 1 — Exposure balance: If you exposed for the background, your subjects are dark. Drag Shadows up (typically +40 to +80) and drop Highlights (-30 to -60) to balance the scene without blowing the sky.
Step 2 — White balance: Backlit golden hour shots benefit from pushing the WB warm — 6500K to 7500K — and adding +10 to +15 magenta tint. This enriches the golden glow without looking artificial.
Step 3 — Tone curve: Create a gentle S-curve — lift the midtones slightly, protect the highlights, and add a subtle lift to the blacks (crushing blacks kills the haze and glow that makes backlit images feel dreamy). A lifted black point — sometimes called a film fade or matte effect — is particularly flattering on backlit images.
Step 4 — HSL panel: Boost the Oranges and Yellows in both Saturation and Luminance to enrich warm skin tones and make golden light pop. Drop the Blue Luminance slightly to deepen the sky without adding a fake vignette.
Step 5 — Radial filters: Use a radial filter centered on where the backlight enters the frame — slightly boost Exposure, Highlights, and Whites in that area to simulate natural light bloom. Feather it heavily so it’s invisible but felt.
Handling Lens Flare in Post
Flare is either your best friend or your worst enemy depending on your style. If you want to keep it, protect it — don’t auto-correct it out with Lightroom’s lens corrections. If you want to reduce it, use the Dehaze slider (lightly — +5 to +15) to add contrast back into washed-out areas, and use the Radial or Gradient filter to selectively add clarity to areas of flare-induced low contrast.
Frequently Asked Questions
What camera settings should I use for backlit wedding photography?
Start in Manual mode. For silhouettes, use spot metering on the sky, ISO 100-400, f/8-f/16, and shutter speed 1/500s to 1/2000s. For rim-lit portraits with flash, shoot at 1/200s sync speed, f/2.0-f/2.8, and balance flash power at -1 to -1.7 stops below ambient for a natural look.
How do I prevent lens flare from ruining backlit wedding shots?
Use a lens hood, partially block the sun behind your subject’s head, or step slightly to the side of the direct sun line. Alternatively, embrace organic flare as a creative element — many wedding photographers deliberately position the sun at the frame edge to generate controlled, aesthetically pleasing flare artefacts.
Should I use flash for backlit wedding portraits?
Yes, when you want rim lighting or need to show facial detail and expression. Use off-camera flash at low power (-1 to -1.7 stops) through a small softbox or sphere modifier. If you prefer natural light, a silver reflector bouncing backlight onto the couple’s faces achieves a similar result without adding gear.
What is rear curtain sync and when should I use it at weddings?
Rear curtain sync fires your flash at the end of the exposure, not the beginning. Use it for first dance shots or sparkler exits where motion blur is part of the creative effect. It ensures motion trails appear behind moving subjects, which looks natural, rather than in front of them, which looks unnatural.
What time of day is best for backlit wedding photography?
Golden hour — the 30 to 60 minutes just before sunset — is ideal. The sun is low and warm, creating long shadows and a soft directional quality perfect for rim lighting and silhouettes. The light is also less harsh, making fill flash easier to balance. Overcast days can produce soft backlit window light indoors year-round.
How do I pose couples for silhouette wedding shots?
Always shoot in profile for kisses so both faces read as separate shapes. Choose poses with clear, recognizable outlines — the dip, forehead touch, walk hand-in-hand, or a lift. Avoid poses where bodies overlap confusingly. Squint your eyes while looking at the couple before shooting — if the pose reads clearly squinting, it’ll read in silhouette.
Conclusion
Backlit wedding photography rewards preparation and confidence. The photographers who nail it consistently aren’t luckier than everyone else — they’ve done the work to understand exposure, practice their flash balance, and train their eye to see poses that translate into powerful shapes.
Start simple. Your next wedding with a golden hour window — position your couple between you and the light, expose for the sky, and shoot the silhouette. Get comfortable with that before adding flash. Then experiment with a single off-camera speedlight at low power and watch how quickly rim lighting becomes intuitive.
The technical side becomes muscle memory faster than you think. And once it does, you stop thinking about settings and start thinking about moments — which is where the best wedding photography actually lives.
If you found this guide useful, share it with a fellow wedding photographer who could use it on their next shoot. And drop your backlit wedding images in the comments — we’d love to see what you create.